


The Art of Hanging Pictures in Period Properties
Plan a balanced arrangement, use appropriate fixings and consider picture rails to display art without damaging fragile plaster walls.

The Character of Period Walls
Period properties rarely offer the simple, uniform walls of a modern build. Georgian, Victorian and Edwardian homes typically have lath and plaster, or lime plaster applied directly to brick, stone or timber. These walls are breathable, characterful and softer than modern plasterboard. They also demand respect. A hammered nail in the wrong place can crack a whole panel of plaster, and a heavy mirror on a single weak fixing can bring down a section of ceiling. Hanging pictures in a period home is therefore less about brute force and more about planning, appropriate fixings and, where possible, using the features the house already has.
Plan the Arrangement Before You Make a Hole
Start with paper. Cut templates to the size of each frame, mark the hanging point, and tape them to the wall. Live with the arrangement for a day. This prevents the most common period-property mistake: hanging pictures too high. In high-ceilinged rooms, the centre of a picture should generally sit at around 145–152 cm from the floor — roughly eye level. If you have a picture rail, the cords drop from above, so the frame can still hang comfortably.
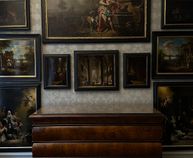
For a group, treat the whole arrangement as one shape. Keep gaps between frames consistent, usually 5–8 cm. Align either the centres, the tops or the bottoms — not all three at once. A strong focal point, such as a large landscape, can anchor the group, with smaller pieces balanced around it. Period homes often suit a looser, collected look. Trust your eye, then check with a spirit level.
- Use paper templates and low-tack tape to test the layout.
- Keep 5–8 cm between frames for visual breathing space.
- Align centres when mixing different sizes.
- Hang the largest piece first, then build outwards.
The Picture Rail: A Period Property's Best Friend
Many British homes built between 1840 and 1930 have a picture rail: a moulded timber strip fixed 30–45 cm below the cornice. It was designed for hanging art without damaging plaster. Brass or steel hooks grip the rail, and cord or chain drops to the frame. The weight is carried by the rail, fixed into the wall structure, rather than by fragile plaster.
Choose hooks that match the rail profile, and line them with felt if metal might mark the wood. Use two hooks for wide or heavy frames so the picture hangs level and the load is spread. Check the rail is secure; if it moves when you tug it gently, have it re-fixed before hanging anything valuable. Picture cord should be rated to at least twice the frame's weight, and always use D-rings screwed into the frame.
- Use felt-lined brass hooks to protect the rail.
- Two hooks for anything wider than 60 cm.
- Check the rail's fixings before loading it.
- Replace old, brittle cord with braided steel wire or modern picture cord.
Fixings for Walls Without a Rail
If there is no picture rail, identify your wall type first. In lath and plaster, the plaster alone will not hold a nail. Find timber studs with a magnet or stud finder, then fix into the studs with cut nails or screws. In plaster on brick or stone, drill with a masonry bit — avoid hammer action near the edge — and use a fibre or nylon plug with a brass screw hook. Never rely on thin picture pins in old plaster; they concentrate pressure and cause cracks.
For heavy frames, spread the load. A timber batten fixed across two or three studs can carry several pictures. Alternatively, use two separate fixings and hang the frame on two screws with picture plates. On very fragile lime plaster, fewer, larger fixings are better than many small ones. Adhesive hooks are best avoided on breathable, historic walls, as they can pull away the surface when removed.
- Find timber studs for lath and plaster walls.
- Use masonry bits and plugs for brick or stone.
- Spread heavy loads across two fixings or a batten.
- Avoid adhesive hooks on lime plaster.
Weight, Balance and Safety
A large gilt frame with glass can weigh 10–15 kg or more. Check the weight before choosing a fixing. Use braided steel picture wire or chain, not old-fashioned cord that may have perished. Attach D-rings to the sides of the frame, about one-third of the way down, so the wire forms a shallow V. For very heavy mirrors, hang directly on two screws using picture plates, and consider a security hook to prevent lifting during cleaning.
Think about position as well as weight. Avoid hanging valuable art above a working radiator, in direct sunlight or on a damp external wall. In period homes, walls breathe, and a picture can trap moisture against the plaster. Leave a small gap behind the frame using bumpons or cork pads. With children or pets, use museum putty on the bottom corners to stop frames swinging.
After Hanging: Repair and Respect
When you move a picture, fill the old hole. On lime plaster walls, use a lime-based filler rather than hard gypsum, which can trap moisture and crack surrounding plaster. For small pin holes, fine surface filler will do, but on historic walls a specialist lime putty is safer. Touch up with matching paint, and note where fixings are located so you can reuse them. Rotate your art every year or two to limit fading, and check cords and fixings annually. With planning and the right approach, you can display your collection beautifully while preserving the walls that give your period home its character.

Post a comment